Gaming Portfolio
My current sections are:
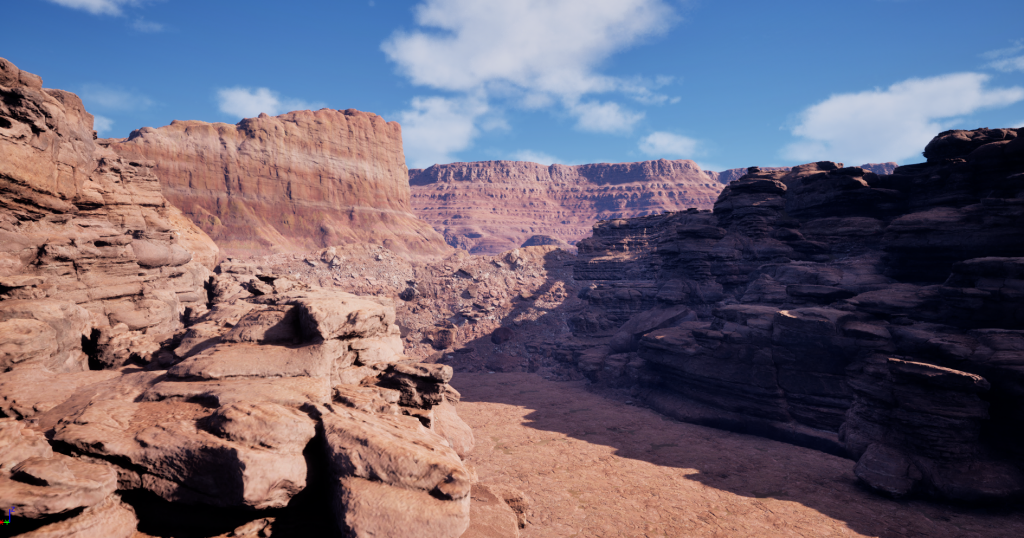
Other Projects
Canyon landscape from my latest Demo Project
Game Jam – CrashCity
Please, for a complete overview, check my team’s Youtube Showcase:
The theme for the Game Jam was “Retro Remake Challenge” where we had to recreate a well-known retro title with their own twist, improving mechanics, visuals, or adding new gameplay features while retaining the core identity of the original.
For this purpose we chose Crash Bandicoot, one of my childhood favourites. Teams were divided into Programmer, 3D Artist, UI Artist and Sound Design. My role for this project was Programmer, so I had the pleasure to open the project, I set up a GitHub repository and connected UE5.5 with Git. There were a few key mechanics from Crash Bandicoot that I wanted to include in Crash City. The first one was the Camera and how it followed you through the level, the second was the famous Crates and third the fixed path enemies.
The Camera
I see that the Camera on the Original Crash Bandicoot does follow Crash but not Crash’s movement. It’s a fixed Camera that follows the path of the level at the point where Crash is. After a bit of research relating Unreal Engine and Crash Bandicoot I learned about a new concept, a Spline. I had to disable the Camera logic that is controlled by the Player in a Third Person Template and then build the new Logic.
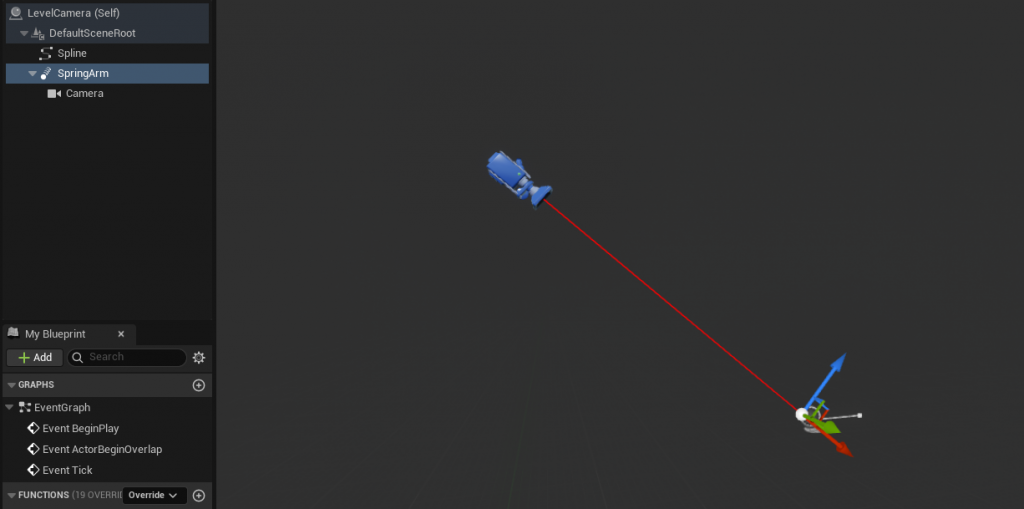
In the screenshot above you can see the construction I ended up with. This Blueprint (BP from now on) is constructed on the idea of laying a Spline through the level or levels. The camera is spawned at the beginning of the Spline and follows the main Character (Corpo instead of Crash, Corpo is a overcaffeinated and suited up version of Crash that runs for a job interview). As shown on the screenshot as well, there is a Spring arm that makes the camera fixed to a point above the character and rotated forward and down allowing up to see just enough of the upcoming level path. The Spline is very easy to extend just by grabbing the final point, duplicating (right-click) and continuing where we want it to go.
Next I will showcase the Logic in the Event Graph.
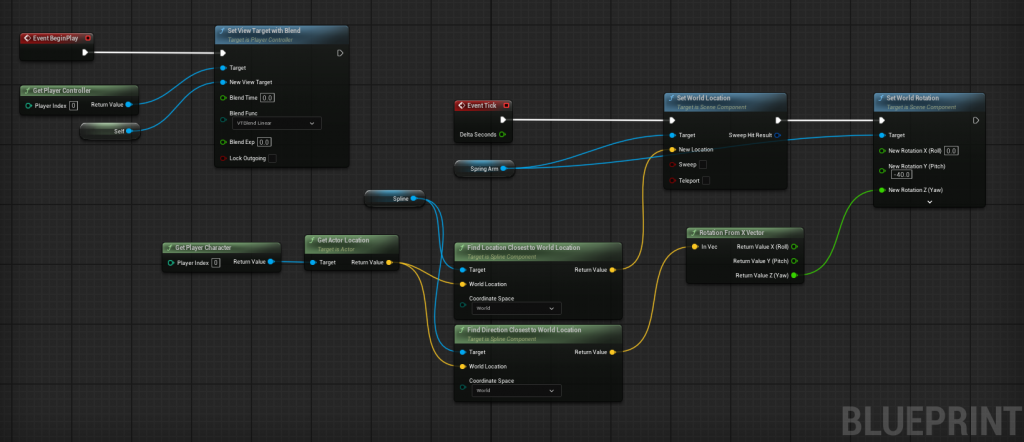
First and foremost, to ensure my own sanity, I needed to remember to turn the collision test to false on the Spring Arm. On the above screenshot, we can see two blocks of blueprint, the one on the top left of the picture initialises the camera to be used by the player controller. It uses the event “Begin Event Play” to set the viewing angle with a self reference and gets a target of the Player Controller in order for later to be moving with the Caracter along the spline with the Character Controller. The second block of blueprints tells the camera to move along the spline based on how close the character is to a spline point. It starts from the Event Tick, This event is fired every frame of Gameplay, which is a really good place and frequency to follow our Character. We need to get our Actor location from the Player Character and also grab the Spline ( I did initialise the Spline as an Object reference variable and the Spring Arm as well) and get “find location closest to world location” and on this node, we join the return value from the actor’s location of the Player Character. This node feeds in the Players location and gets a system of coordinates, in this case I chose World coordinates as next, I grabbed the Spring Arm as an object reference and joined it to Set World Location. This node can be seen connected to the line of execution and feeding the new location from the “find location closest to world location”. I needed to also update the rotation of the camera in case I made a non-straight part of the level with the spline on it, and that is the last part of the block of the blueprint. I first got a “find direction closest to world direction from my actor location with the spline as the target. Also set it to world location, then from the instance reference of spring arm I needed a set world rotation to update the rotation that the camera is facing and not get a diagonal level, even if the level is directed diagonally I want my camera to follow me from behind onwards. I joined the line of execution from set world location to set world rotation and finally the return value pin from the “find direction closest to world location” to the new rotation pin of “set world rotation”. UE in here will give us a conversion pin called “rotation from X vector” but we do not want to affect all axis of rotation, so we break the link between the conversion node and our final node, split the pin entries and connect just the Jaw (Z) axis. Keep in mind we need to apply our fix value of rotation of the camera in the last node of the line of execution, in my case it was -40 on the pitch (Y) axis.
The results of this BP are visible on this illustrating video.
Update Character Movement
I had to briefly update the character movement so when I turned a corner, the forward vector of the movement is relative to the camera and not to the World coordinates. I changed this on the BP of the Character, you can follow on the screenshot below.
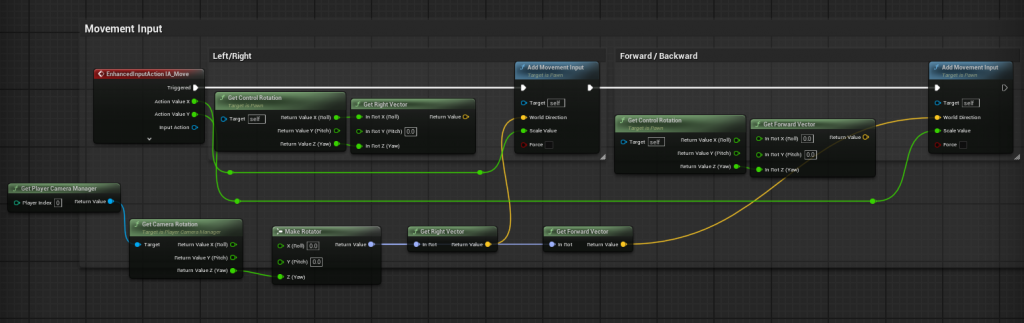
I don’t know if it’s noticeable without zooming in, but following the line of execution, I have left the original nodes unconnected just for reference and added the new ones on a line at the bottom.
Right after the Event at the beginning, there’s 2 original nodes to get the control rotation in order for the input to know which way is left or right, instead, we want the camera rotation, for this, we get the player camera manager, from it we get the camera rotation, as we are interested in getting the forward vector, we need the jaw (Z) axis, as our camera rotates left and right depending on the spline, so if we look slightly right, getting this Z axis rotation will get us our new forward direction. From our camera rotation we need to make a rotator, this rotator will give us both the right and forward vector. As seen on the original movement nodes, the inputs are feeding of the right vector and the forward vector, so we need to feed our new right vector and forward vector (from our rotator) to the input nodes. In the previous video, you can see that even when just pressing the W key for advancing forward, the character keeps straight and does not bump into the wall.
Camera Modifier
On the Original Crash Bandicoot there were levels with small caves and narrow spaces that only allowed Crash just to pass through with his height. With the Camera system I have right now, the camera will just keep being high and do not show us our Character going through the interior. In order to achieve this, I need a camera modifier BP and a volume BP in order to activate the modifier.
I created the Modifier BP and added a Blueprint Modify Camera under the Functions (Overridable) tab. I have to research and watch tutorials quite a lot for this part, as it was also a new topic for me. I learned that this BP Modify Camera gives me 2 nodes, a starting point with the beginning location and rotation of the camera and the ending point with the location and rotation that the camera will have at the end of the effect. For this effect I am looking at moving the Spring arm and rotating the camera so it follows the back of the character.
I also created the Volume BP to activate the modifier, added a simple Box Collision and linked it to the Event “On Begin Play”. We then get the player camera manager, from there we can get a node call “add new camera modifier”, we need to reference our other BP, corresponding to the Camera Modifier in order to add it to the volume.
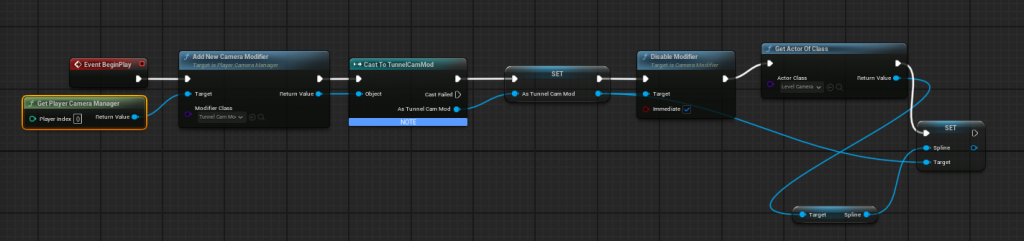
In the screenshot above, the line of execution follows as explained before, then casts to the BP Camera modifier in order to set it as a variable and prepare the terrain for when the character leaves the volume, so then we disable the modifier and get actor of class Level Camera which is our spline following camera, this class then sets it’s target as the spline in order for the camera to keep working as intended when leaving the volume of the camera modifier.
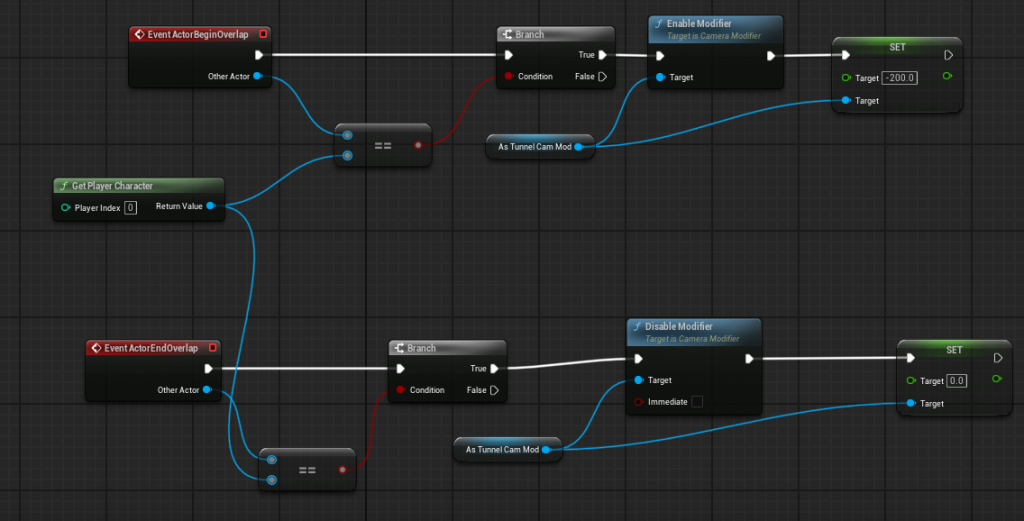
This block above is still the BP of the Volume, as you can see we have two events, “on actor begin overlap” for when the character enters the volume and “on actor end overlap” for when the character exits the volume, we then set the other actor of both events to be equal to the Player character as the condition of a branch, when it’s true we can then enable the modifier or disable the modifier, the target on both cases is a reference to the BP Camera Modifier. The last node of each path is setting a variable called target from the BP Camera Modifier, in our case, this means the height difference during the volume, so when the modifier is enabled, we lower 200 units and when it’s disabled we do not lower it.
Now, to construct the BP Camera Modifier.

As you can see on the Blueprint above, the two previously mentioned purple nodes are the beginning and ending parameters of the camera. In order to understand this, there’s two important things that needs to go on the return node (purple top right). The modified location and the modified rotation. Let’s get the location first, the initial location is added to a vector that contains the alpha and a value of -250 on the jaw (Z) axis, lowering the height of the camera until a comfortable point to see the Character’s back. Now then, the rotation, we grab the actor’s location from the Player character and target the spline with a “find location closest to world location” node in world coordinates, then with this point and the lowered height, we find look at rotation to get the final rotation. The idea is that these two points create a straight line in order to give us a complete front rotation from that lowered point. I feel like this was the hardest part of the Game Jam for me, it was a challenge but I did learn a lot. You can see the effect of the Camera modifier and the Volume on the following video.
Crates
I think the crates were an integral part of the original game and one of my favourite parts of the old mechanic. In order to integrate them. I created two sections of Crates: Normal and Metal, Metal crates are indestructible whether normal ones are destructible. When mirroring the logic, there are only metal crates and metal bouncy crates.
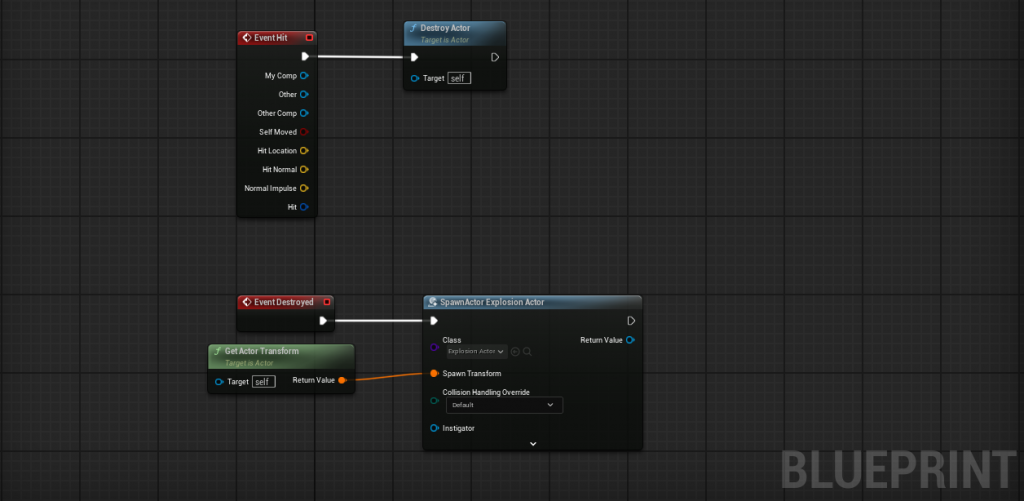
In terms of blueprints, for the normal crate, simple enough, Event any damage destroys the actor, with the metal one, the event any damage is not connected to any nodes. The normal crate is parent to the bouncy one, the TNT and the NITRO crates, and the bouncy one is parent to the Metal bouncy with the same logic difference explained a second ago, its event any damage is not connected, which leaves us with 3 crates to explain. The bouncy, the TNT and the NITRO.
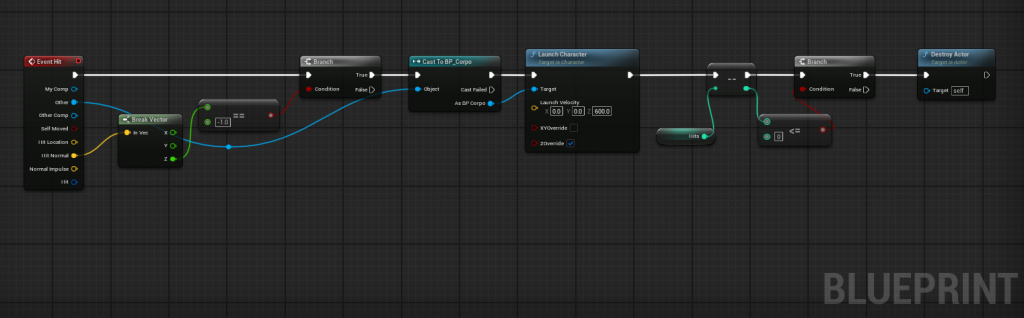
The Blueprint above corresponds to the Bouncy Crate, I started with the event any hit, that checks for a condition whether the hit comes from a normal, only normal on the jaw (Z) axis available with a direction of -1 is the top lid of the crate which is where we want out character to bounce off, we cast to the BP of the character, we then launch the character on the Z axis, overriding initial Z direction. I added a number of hits (3) that the crate can bounce before being destroyed, so each time, we decrease the number of hits by 1 and then check that if the number of hits is less or equal to 0, we destroy the crate. Metal Bouncy crate uses the same logic, without this last part.
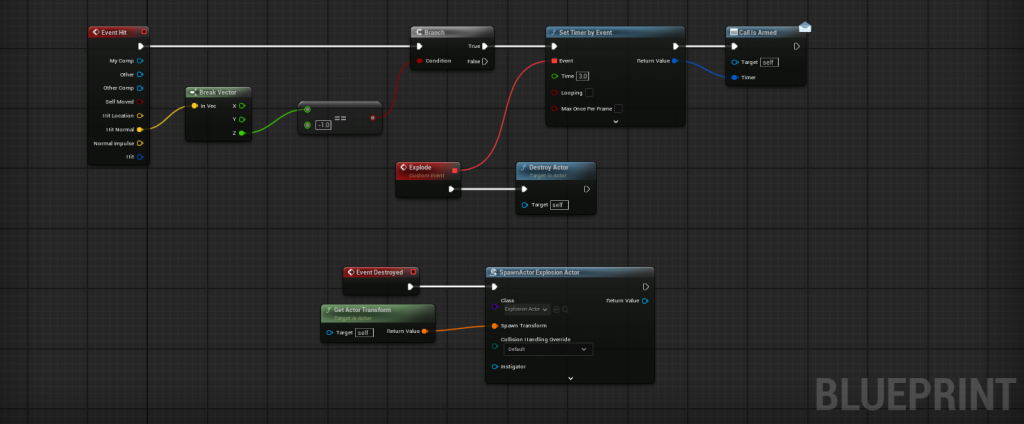
The Blueprint above correspond to the TNT Crate, as you can see, the initial part of the event hit checking for the normal is the same as the bouncy as the TNT crates only start to detonate when you hit them from above. This calls to setting a timer of 3 seconds with the event explode attach that will destroy de crate, the timer itself calls to an event dispatcher called “Is Armed” in order to feed the UI element of the Crate. When destroyed we called a BP for the explosion. Said BP Explosion only applies radial damage at the spawn location.
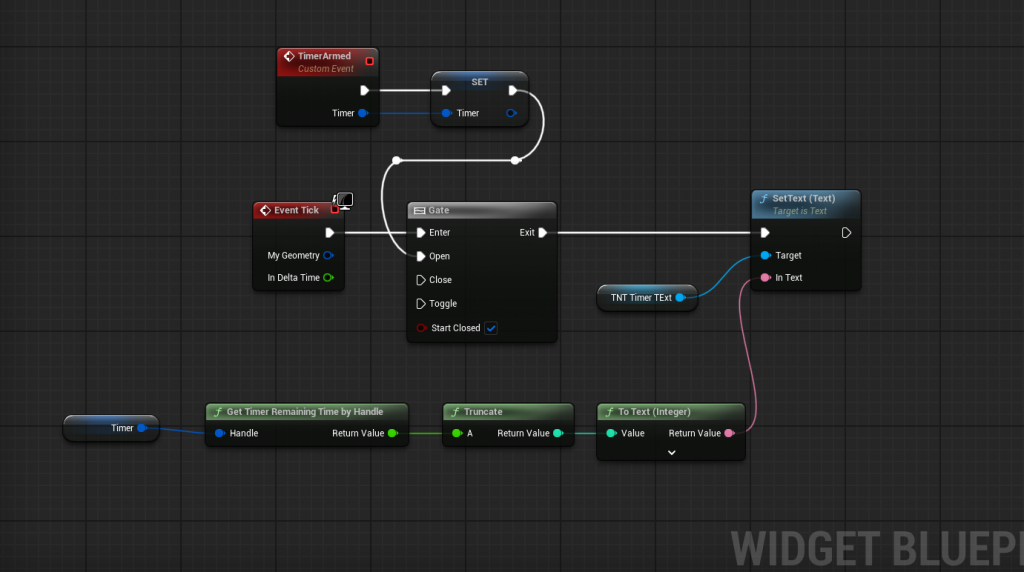
The logic behind the detonating widget for the TNT Crate is above, I have set the timer when the Crate is armed (event dispatcher from before) and once it’s armed, with event tick updates the text on the UI with a truncated number decreasing from 3 to 0 until it explodes, this will be showcase in a video at the end of the section.
The NITRO Crate is much simpler as it does not need the timer or the condition to step on it from above, any hit will detonate it.
Enemies
The logic Behind the enemy that can be seen in the videos (all 3 of them) is to set up 2 points in space editable outside the event graph, point A and point B. The enemy needs a Bounds Mesh Volume to define the area that he can move on and point A and B have to be place within this Bound Mesh Volume.
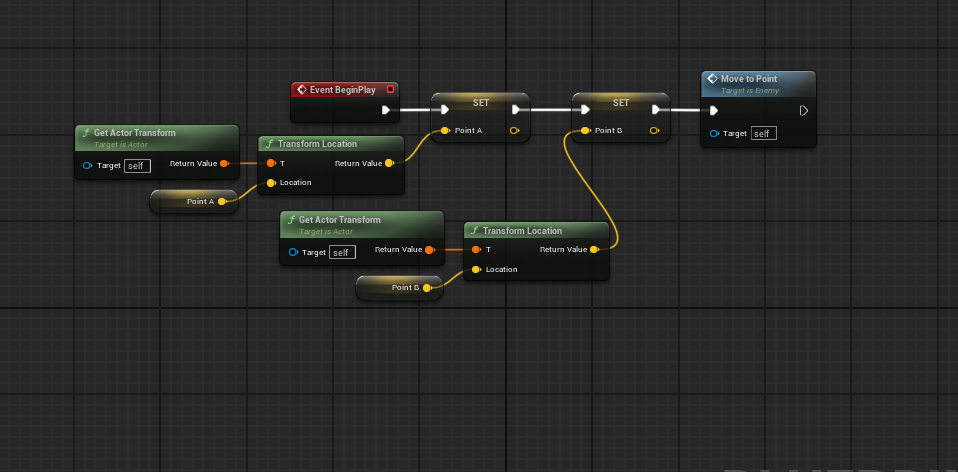
On Begin Play we set two vector variables for point A and B and set their location to the points selected in the level grabbing the actor transform and finally calling a custom event called “Move to point”.

We can define this custom method by cycling from point A to B or from B to A. We need a Boolean variable called isAtoB, we feed this variable alongside the points to a select vector node that selects point B when the boolean is false. Then the AI move to node will make the actor (enemy) go to point B, then we use a Not Boolean node to flip and set the “isAtoB” to true and called the method again, selecting now point A as destination moving from point B. There’s also an event any damage that would destroy the actor.
Spin Attack
The classic spin attack of crash bandicoot was also a challenge as I am now learning about animations and combat system. I will explain the logic behind it with no animations yet as that was a task for another team member.
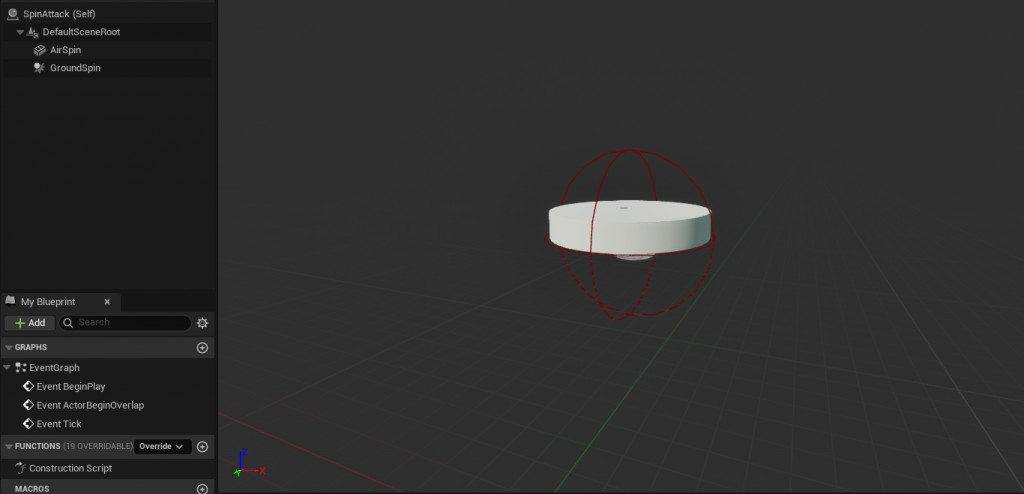
On the original game, there were times where you had to time your height with your attack for targeting a specific crate in the level, so I had one sphere collision space for a ground spin and a disk for an air spin as in the ground we target the height of two crates and in the air we target the height of just one.
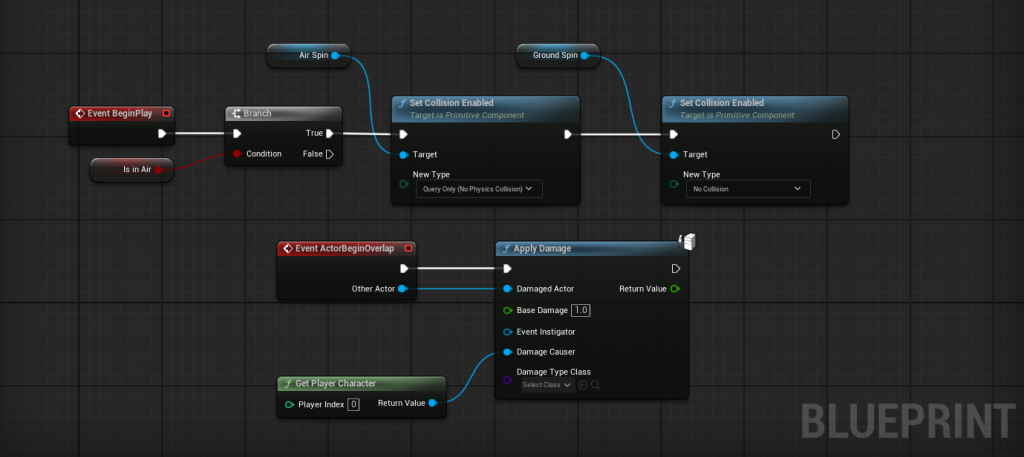
In the Blueprint you can see how each different collision is enabled whether the Character is in the air or not. We then have a simple apply damage of 1 to whoever actor enters the collision sphere or the disk. In the previous video of the showcase of the crates, you can see how the first tower of crates are destroyed, the collision sphere is set to visible, though is not very easy to see on the video. but that’s the attack that destroys them.
Final Thoughts
I honestly joined the team as a programmer to learn more and to have a challenge which ultimately I did, most of the functionality was a challenge for me, but as a Developer, being able to research and learn new tools is one of the best skills in my opinion. I keep feeling that Unreal Engine has a thousand more tools and secrets still to be learn by me which is my path from now on. This is what I enjoy the most doing and I will keep doing it.
– The Dream Moth –
Video Presentation.
Visual Art
I will expand on this area including assets used and logic behind the Level Design. For now I leave you with the current state of my 2 levels.
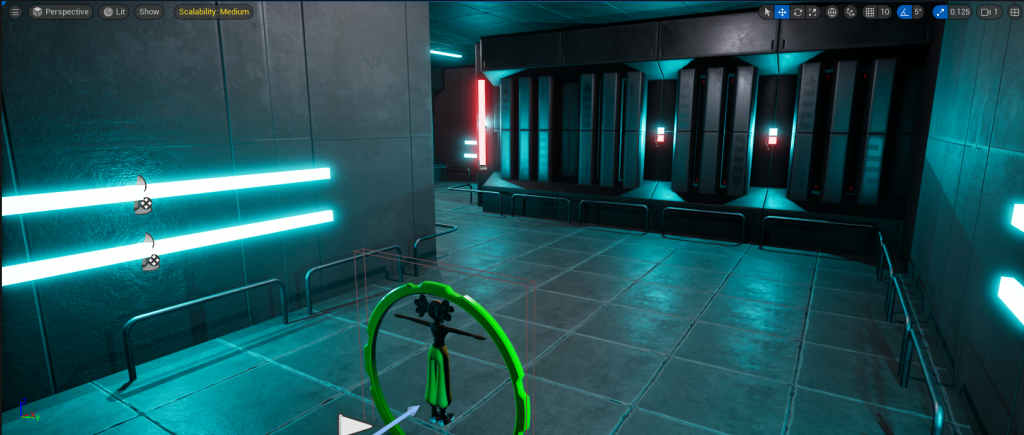
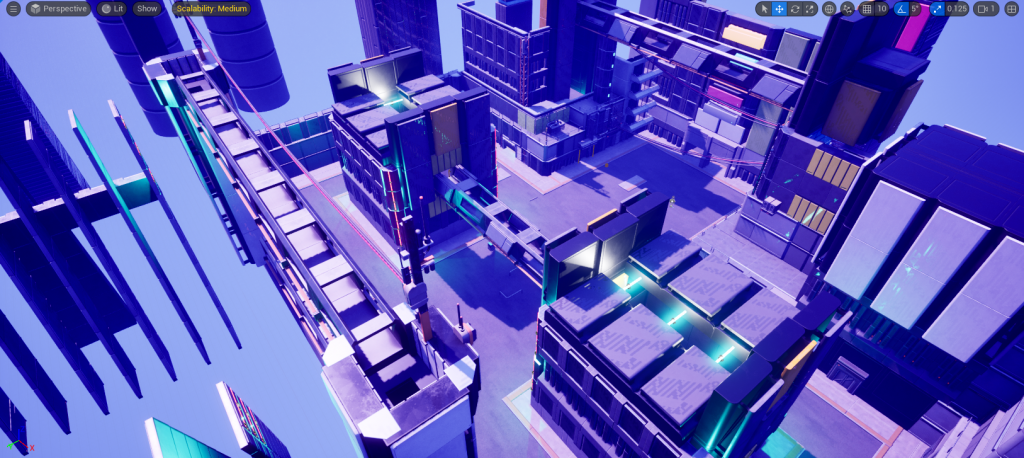
-Space Port
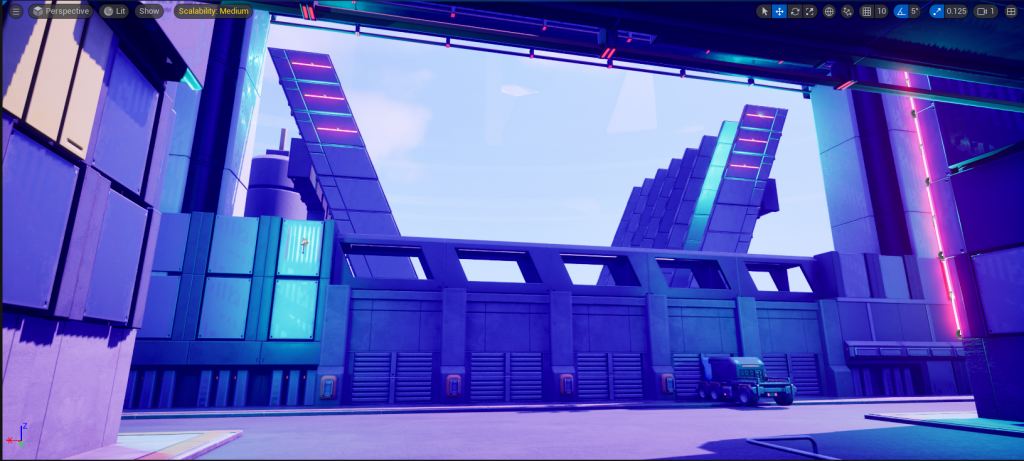

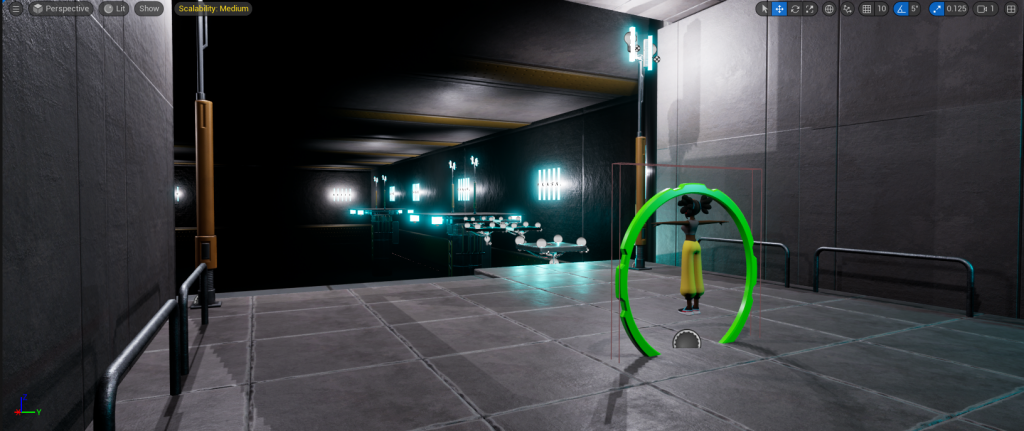
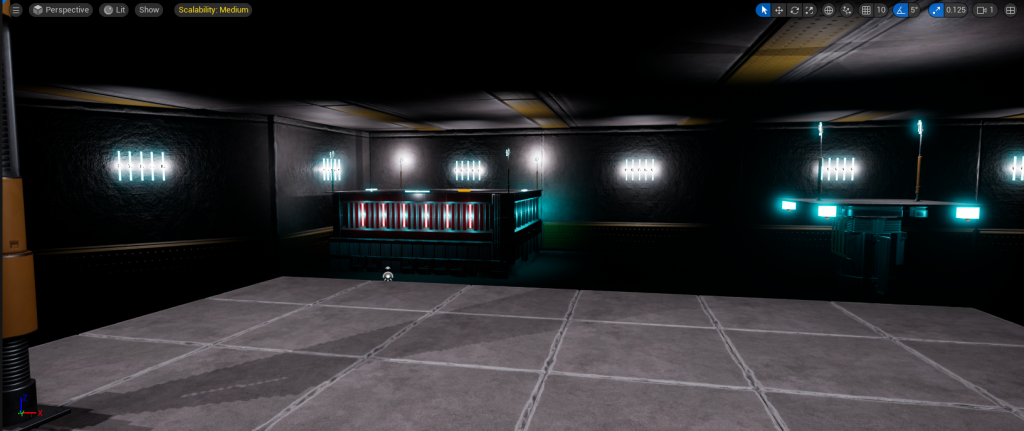
-Port Warehouse
This level has a huge pit that goes deep. I have included an instant death at the bottom in case the Character falls, making this level more platform based.
The green circles you see on the pictures are my respawn actor.